Photo shop Tutorial
This was my first time ever using Photo shop therefore I had no experience with how the software worked and operated. I was completely new to the whole thing. At the beginning of the lesson we were shown the basics of Photo shop and how we were to use certain elements of Photo shop using the tools that Photo shop supplied. Our aim at the start of our lesson was to be able to use a verity of different tools within Photo shop in order to edit our image. The overall steps that we were working towards using correctly and understanding were:
Steps:
- Creating a new document to a specific paper size (A3)
- Pasting an image
- Layers - Creating new layers
- Levels - using the levels tool to adjust your image's white and dark balance
- Multiply- Changing your layer style to multiply , to make sketches into tracing paper
- Painting - with the paintbrush and erase tool
- Select - highlighting areas of my page with various selecting tools such as the lasso tool
- Changing the opacity of a paint brush or the erase tool to build u new areas of colour and detail
- Saving and Screenshotting work
My first step in using photo shop was to firstly open a new document and adjust it to the correct size that I wanted, the size that i selected was A3 as I thought that A4 would be too small. The paper that i used also had be changed and was set to a specific type. The next step was to alter the page so that it would either be landscape or portrait depending on what the image was that you selected and weather the image would look and fit best on either landscape or portrait. I opted to stay with my page being portrait as I felt that my image looked and fitted better being in that position as it meant that there was more room for me to expand my image to make it larger. The next step was to then find an image that i liked, however it was important that this image was already made to be a sketch so that it was easier for me to edit in Photo Shop . Here's where I found my image
I then copied my image from the Internet and pasted it on to my Photo shop document. The image that I had chosen was a sketch of Bambi, which later on I found out that it was a bit harder to do then what my class mates had chose for there images as there's were a lot easier to add highlighting and shading too rather than mine, and overall just simpler for a first attempt on Photo shop. For my next step I then adjusted the size of my image so that it fit the page well and wasn't burred, I did this by using the ctrl and shift buttons on the keypad of my computer, this made moving and adjusting my image easy as it meant that i was able to stretch my image to fit the page so that it wouldn't look out of proportion.
The next step was to create a layer for my image so that I was able to add colour, shading and highlighting with out adjusting or messing up my initial image or first layer. The layer that we created we renamed 'image' so that we knew that, that was the original image so that we didn't touch the first layer. The next layer that we made was called 'colour' and that was the layer that we were able to play around with using the paint tool and eraser tool to make outlines and add colour over the top of our image. However before we were actually able to use colour we first had to adjust the levels of white and dark tones in our image or layer by adjusting the white outcast shadows and the dark sketch colouring of our image to make it more balanced, this was so that we could get rid of any harsh lines or to outcast any sketch shadows we did not want to be shown after adding colour to our image.
Within our layers there is also an option to change the layers from 'normal' to 'multiply' this change meant that we were now able to change our layer to tracing paper so that we could add colour over the top of our image and still be able to see the outlines, this made things a lot easier when trying to add colour to our image.
After all of those steps I was finally able to add colour and outlines to my image, I selected the specific colour that I wanted to be the main colour for my image and began to fill in the areas that I wished that colour to be. Any mistakes that I made I was able to correct by going around the edges with the eraser tool, this was to clean up and make the overall look of my image a lot more put together. After filling the areas that i wanted in that certain colour we were to make another layer.
The next layer that i made I called 'shade' like the name this was the layer that we used in order to add shading to our image, we used the shading tool to adjust the amount of paint on the paintbrush so that it was partly faded, this specific brush made the shading look more real on the image, this tool also meant we could adjust the size of the brush so that I could get into any smaller areas and corners with out having to go back and use the eraser tool too much. Another tool that i found very useful when using Photo shop was the 'polygonal lasso tool' as it meant that I was able to select my image by going around the lines of the sketch until it matched up, this tool I found was quite easy to use and was effective.
For my last step I created another final layer to add more detail to my image, this layer was for highlighting, within this layer i highlighted the specific areas where light would naturally be on the image to show more depth and make my image look more real and more 3D. On this layer I was also able to change the opacity of the paintbrush tool to build up new areas of colour and add more detail to my image. After all of those steps I saved my image and screen shot my final product.
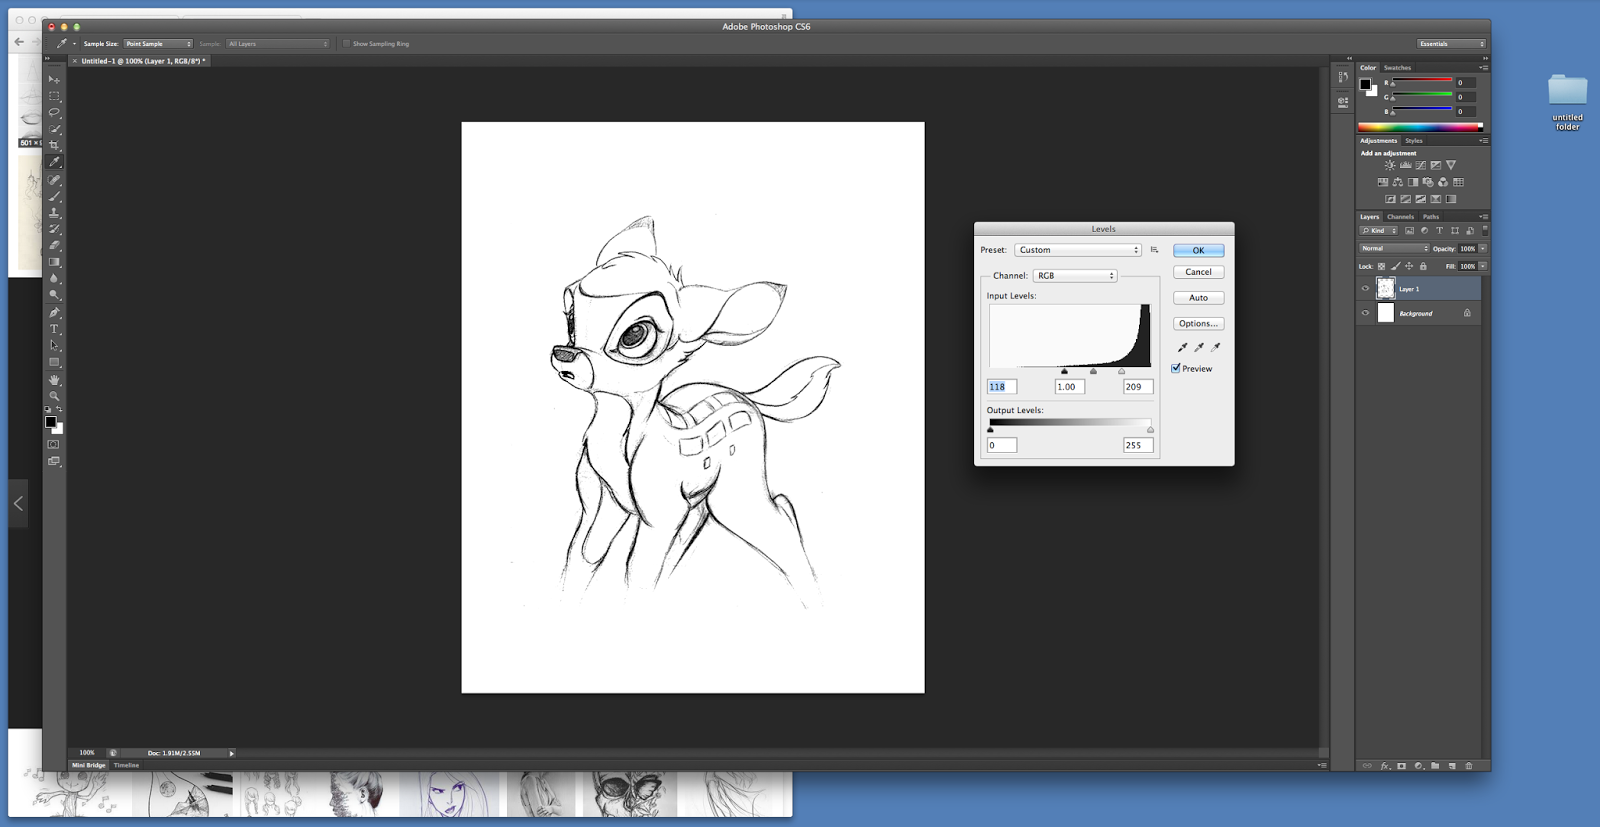 |
| This was what my image looked like after I had adjusted the white and dark tones, removing the outcast of shadows |
No comments:
Post a Comment